
1A
Welcome to GD114
Attendance Take role. Let waitlist students know whether there will be any seats available or not. Suggest to those who did not get in to speak with our GD Advisor, Arlene McCashew – arlene.mccashew1@pcc.edu.
NOTE: Inform waitlist students that they need to check their PCC email regularly during this first week in case their is an opening. “This is how I will contact you to offer an open seat.”
Introduction Talk about why typography is going to change the way you look at the world. It's all about the details and it is all around us wherever there are written words. It is the foundation of graphic design. Getting better at typography is a pursuit that will likely span your entire career as a designer. The more adept you get at working with type, the better your designs will be. Strong typography skills take time and practice to develop. You begin your training today.
Lecture/Slides Inspirational Slide Show. Stress the importance of taking notes and keeping a sketchbook (Field Notes).
Course Structure We begin by learning the history of type (today’s reading homework & forthcoming class discussion). Then we will learn what to call the different parts of letterforms (Type Anatomy). Closely related to anatomy is a list of Typographic Terminology that we will discuss and commit to memory. There will be a quiz in 2 weeks on Type Anatomy and quiz in week 9 on Type Terminology (we will discuss the list of terms throughout the course leading up to this quiz).
We will discuss the Classification of Type and use a series of exercises that will train your eyes to recognize the visual differences of typefaces and commit to memory the traits of 12 rock solid typefaces. There will be a quiz in week 10 to test your typographically trained eyes. This class, maybe more than any other in your design education, is training you to appreciate subtle visual differences that have significant impact in your work.
At the end of next week we will begin our first big class project that will be worked on for 3 weeks. The second project that follows will also be worked on for 3 weeks. Then we will have 2 faster paced “assignments” that will be completed in about 3 class periods each. There will be a final exam that covers the material from all 3 quizzes.
Handouts Syllabus, Schedule, Materials List (Syllabus may take an hour to get through if you cover everything.)
NOTE: Cover the Materials List next week 2A when it is closer to when they need the materials. Many will already have talked about the materials in GD120 also.
Take a 5-10 minute break They have been sitting listening to you talk a long time about pretty boring stuff.
Video Beginning Graphic Design: Typography
Google Drive / Course Website Show how the course website is structured. Write course site URL on whiteboard: bohls.design/gd114mw | NOTE: Send email with access to Google Drive PUBLIC folder before classes begins.
Google Forms After showing them the Course Website, have them fill out a simple form so that they know how to complete the reading assignment (fill out Google Form) which will inform/direct the conversation about Type History in the next class 1B.
Icebreaker Exercise Three Things in Common. Break students into 8 groups of 3 people each.
Homework Reading assignment. Specifications are on the class website.
NOTE: Don't forget to fill out the Google form before next class.
1B
Anatomy of Type
Attendance
Take role. Let any waitlist students that showed up know whether there will be any seats available or not. Suggest to those who did not get in to speak with our GD Advisor, Arlene McCashew – arlene.mccashew1@pcc.edu.
Course Website
Show the course website on the overhead. Point out how the calendar/outline has reordered since day 1 is behind us. Review the outline of topics and activities for the day.
Textbook Overview
Talk about the different sections of the book and what you can learn from each.
NOTE: Not using textbook in Fall 2019. This will be an overview of the online articles we will use instead. Revise class materials to reflect this change.
Anatomy Lesson
Show Lynda.com video that quickly identifies all the anatomy terms. Then go through each term outlined on the topic page. Show diagrams on the screen.
NOTE: Nail down the terms and definitions independently from textbook (too many discrepancies caused unnecessary student confusion). Maybe find a better video for anatomy.
Discussion
Talk about the reading assignment (history & evolution of type). Find the best questions/comments submitted via the Google form (assignment 1A) to elaborate on.
NOTE: Fall 2018…This did not provide for much class discussion. It was mostly me talking at the class. Find a way to make this more engaging. Show letterpress process video here and see if that helps trigger questions and/or interest.
Video
Show Lynda.com video on Doyald Young.
2A
Type Terminology & Classification
Show & Tell
Gather all of the materials on the official materials list for the course. Show each item and tell how we will be using it in class this term.
Typographic Terms
Go through the list of terms. Read definitions, write/diagram on the white board what these things are.
(This will take an hour or more.)
Take a 5-10 minute break
They have been sitting listening to you talk a long time about pretty boring stuff.
Video
History of Typography. Fun stop-motion animation, 5 minutes long.
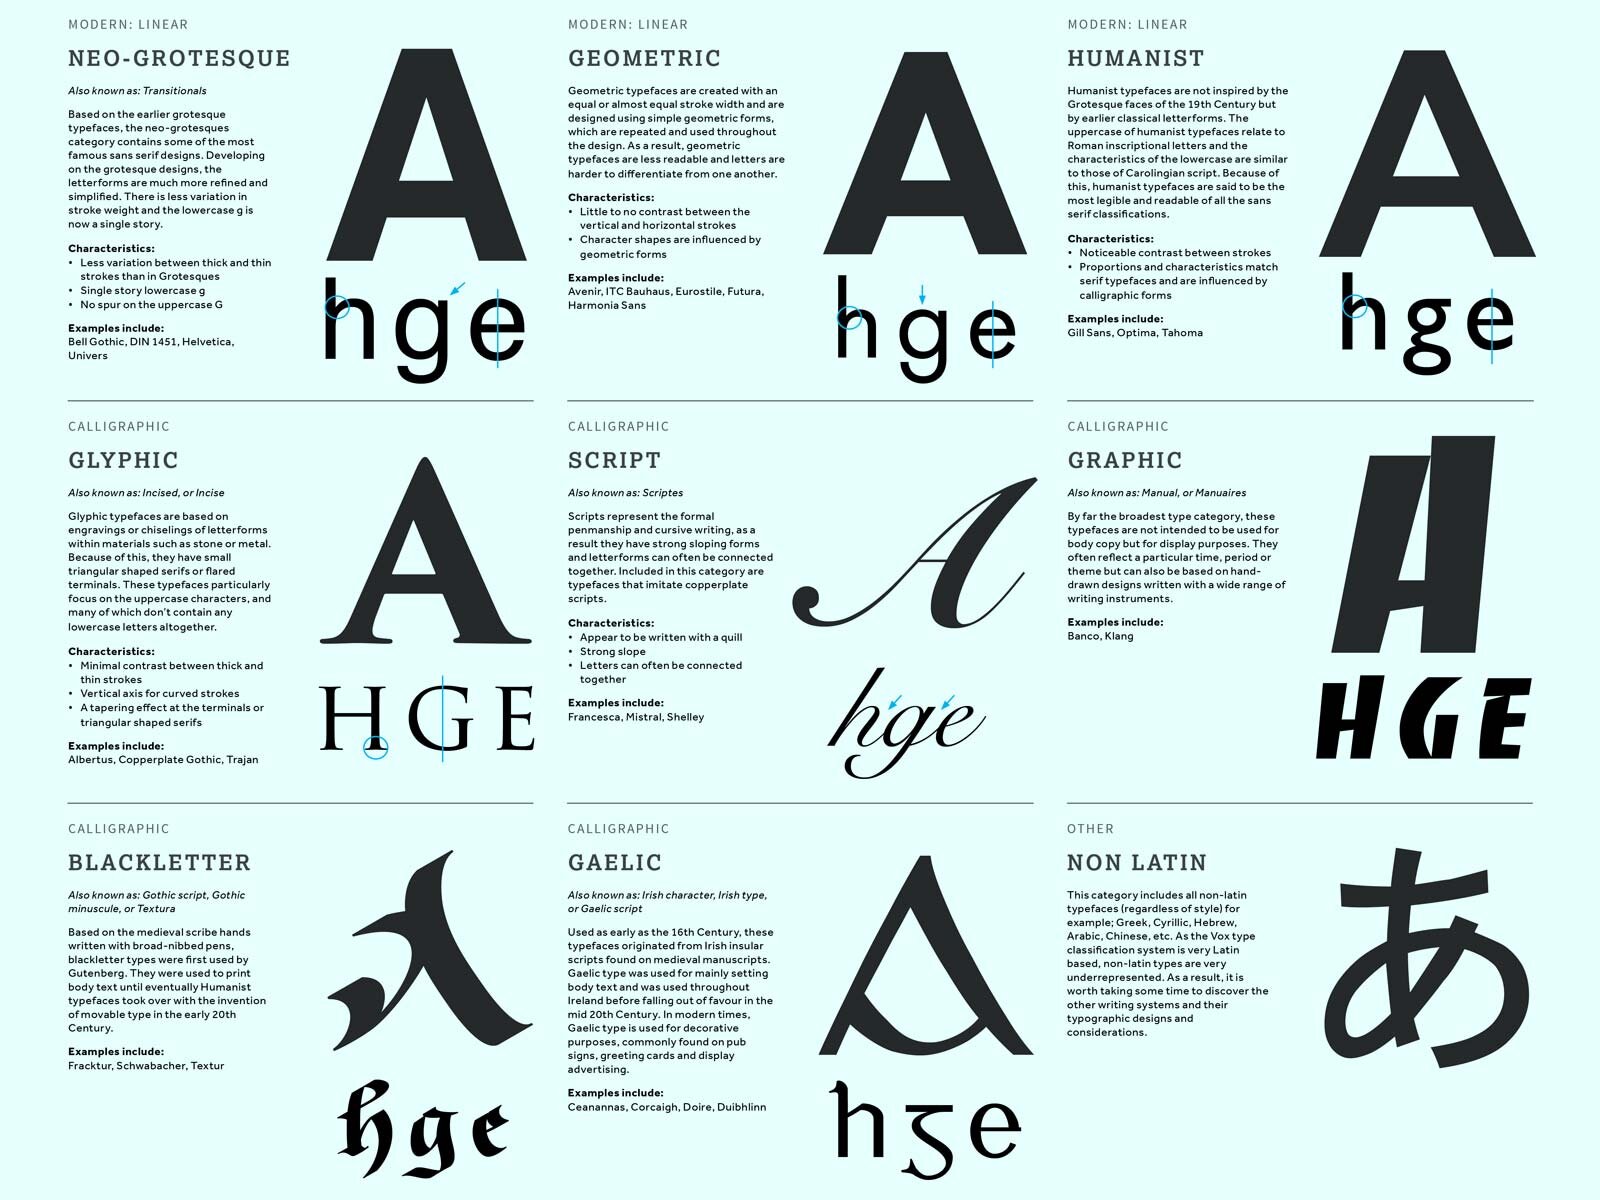
Type Classification Lesson
Explain the differences between classifications. Discuss how different scholars use different criteria to classify type.
Review
Type Anatomy Terms via a Kahoot online game.
NOTE: Fall 2019… I don’t enjoy using Kahoot. I know the students like it. Daniel likes it. I have a difficult creating and using Kahoot in the classroom. Consider an alternative “fun” way to help study/learn this material.

2B
Exploring Typographic Forms 1
Quiz
Anatomy of Type. Send Google Form (quiz) to students via email.
NOTE: Remember to disable the quiz (not accepting submissions) after it is finished. This prohibits students from accessing it until everyone in both classes has taken the quiz.
Introduction
Project 1 – Single Letter. Go over the specifications and design principles for the project. Show examples from previous classes. Show slideshows.
NOTE: Next year find examples of designs that utilize these design principles. Put together a slide show and/or topic page to show and discuss.
Lab
Have students sign up on the whiteboard for individual feedback during the remainder of the class.
3A
Exploring Typographic Forms 2
Quiz
Typographic Terminology. Allow 25 minutes for quiz (25 questions).
(Most students finished in less than 15 minutes.)
Critique
Collect ONLY 1 of the 3 pages of thumbnails. Ask the students to submit the page they would like the most feedback on. Explain there is not enough time to get through every students designs for every design principle. Use the Elmo device to show the pages to the class via the projector. Mark up designs with red pen. Discuss what changes will make the compositions better. NOTE: Think of yourself as the Art Director. Suggest changes as you would to a junior designer. They do not know what good is yet. Be direct and decisive.
Take a 10 minute break
They have been sitting watching you go through a lot of feedback and direction. Some will have completely tuned out. Try to figure out ways to involve them more in future critique without sacrificing too much time. It is a lot to get through.
Demo
Tight Roughs. Before beginning the demo, take a thumbnail design and source material (letter printouts used to make the design) and enlarge it on the copier 229%. Explain to them how to use the proportion wheel to figure out what percentage to use to attain the correct size. Ask if any have used a proportion wheel before. Trace over the letterforms to recreate the thumbnails design at the larger 4" x 4" Tight Rough size.
Lab
Have students sign up on the whiteboard for individual feedback during the remainder of the class.
3B
Exploring Typographic Forms 3
Video
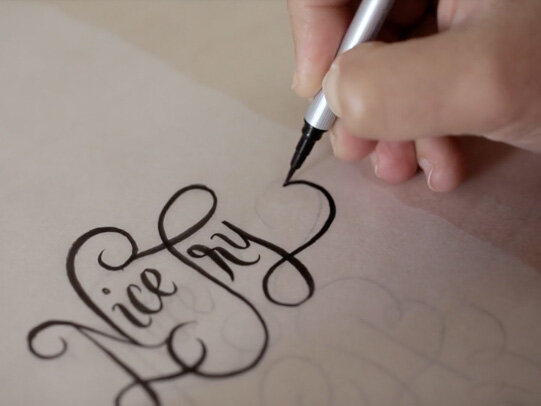
5 minute Jessica Hische inspirational video.
Checkin
Check to see if students met their deadline with the thumbnail designs in the correct format.
Lab
Have students sign up on the whiteboard for individual feedback during the remainder of the class.
4A
Exploring Typographic Forms 4
Critique
Collect ONLY 1 of the 3 pages of tight roughs. Ask the students to submit the page they would like the most feedback on. Explain there is not enough time to get through every students designs for every design principle. Use the overhead device to show the pages to the class via the projector. Mark up designs with red pen. Discuss what changes will make the compositions better.
NOTE: Think of yourself as the Art Director. Suggest changes as you would to a junior designer. They do not know what good is yet. Be direct and decisive.
NOTE: Some will have completely tuned out by the end of critique. Try to figure out ways to involve them more in future critiques without sacrificing too much time. It is a lot to get through.
Take a 15 minute break
Before they leave for break, have them put their other 2 tight rough pages on their desks. Go around and check off the ones that successfully met the deadline to have 3 page of tight roughs mounted on cardstock. 15 minutes should be enough time to return their page reviewed on the overhead projector and check them off for deadlines.
Demo
Review the steps outlined on how to take Tight Rough designs to Final Comps. Refer to the list of steps on the creative brief. Also, show examples of what this looks like via the overhead projector.
Lab
Revise Tight Roughs, Final Comps. Have students sign up for individual feedback on their other Tight Rough comps during the remainder of the class.
4B
Exploring Typographic Forms 5
Video
Ira Glass on Storytelling - 2 minutes. This may be a good message for some students to hear right now. The amount of work they are doing in all of their classes is starting to pile up. They may not feel as confident in their work. This is normal. Fight through it. It takes time to get good at creative work.
Discussion
Show students examples of mistakes in making final comps on the overhead projector. Talk about how to not make those same mistakes. EX: clean the photocopier glass, mount to cardstock before trimming to final 6x6 size, ink past the trim lines (light pencil bounding box), etc. Show/remind them of the PDF checklist of things to turn in and pay attention to when executing final designs (linked to creative brief page).
Due
Type Identification 3B is due today. Remind them to submit results via Google form if they have not done so already.
Lab
Final Comps. Have students sign up for individual feedback during the remainder of the class.